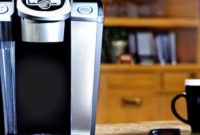
Single cup coffee makers have become a very popular standard in most kitchens today. The ease of use and convenience of a quick cup of coffee cannot be denied. There will come a time however, when the machine needs to be thoroughly cleaned so you can still enjoy a great cup of coffee without a funny taste. Learning how to clean Keurig 2.0 with these simple steps can help.
Keeping your machine properly cleaned will not only ensure a great tasting cup of coffee every time, but will also keep it in good shape for longtime use. Some of the determining factors as to how often you should clean your machine include how much it is used, and how many minerals or “hard” your local drinking water contains. A good rule of thumb is to clean your machine once every 3 to 4 months. Some parts such as the water reservoir are dishwasher safe while other parts of your machine will need to be cleaned by hand.
First step is to open your brewer top and take out the K-cup holder. When doing this be careful because there are two sharp needles to contend with. One is at the top, and the other is at the bottom. These needles puncture your K-cup to allow the water to brew through and create your coffee. You can place the holder in your dishwasher because it is dishwasher safe, or you can rinse it by hand under warm water being cautious of the needle inside. Check the holes at the bottom of your holder to be sure they are clear and free of any debris that may clog them.
Next, use a paper clip to clear the buildup inside the holes of the top needle in the K-cup holder. A paperclip works best because it is somewhat flexible. Carefully push it into each hole on the needle to clear it. After clearing everything, you can wipe it all down with a soft cloth and then place the holder back in your machine.
Descaling comes next. Empty your water reservoir and then fill it with pure undiluted white vinegar. Run your brewer with an empty holder for four large cup cycles being sure to dump the hot vinegar out after each cycle. This will push the hot vinegar through the inside tubes and valves of your machine. Then leave your machine on for approximately 3 to 4 hours allowing the vinegar time to work by breaking down any build up that has accumulated in the valves and tubes.
When you are ready to clean the vinegar out, fill the water reservoir to full and run large cup cycles through the empty machine until the reservoir reaches empty. This will wash out all the vinegar traces in the machines valves and tubes. If you noticed a vinegar aftertaste you may have to run another cycle through your machine.
By using these simple steps in how to clean Keurig 2.0 you will have a K-cup brewer that not only runs well, but brews a great tasting cup of coffee every time.


