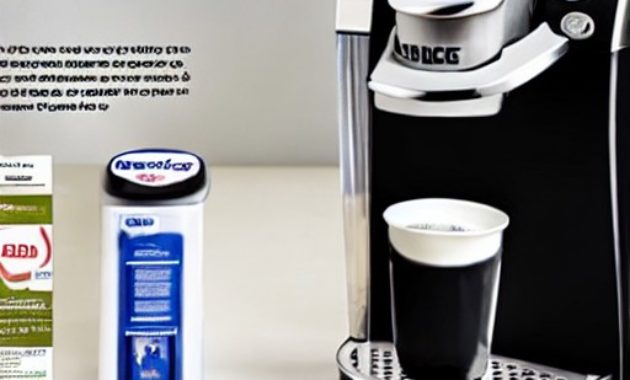
There are times when your K-Cup coffee machine just needs a little Descale love. In this blog post, we’ll outline the steps necessary to properly descale a Keurig Supreme machine. We hope that our step-by-step guide will help you get your machine back up and running in no time!
Table of Contents
1. Unplug Keurig Supreme from the wall and power it off
In today’s blog post, we will be discussing how to descale a Keurig Supreme. This process is necessary to keep your coffee machine running at its best and can be time-consuming if not done correctly. To start off, unplug the Keurig Supreme from the wall and power it off by pressing and holding both buttons on the front of the machine for three seconds. Once it is unplugged, wait 15 minutes. After fifteen minutes have passed, reinstall the K-Select filter that came with your machine and begin brewing again according to manufacturer instructions. Be sure to read these instructions carefully as failure to do so may result in damage or loss of coffee quality!
2. Remove K-Cup pod holders
Many people have difficulty removing the K-Cup pod holders from their Keurig Supreme coffee brewers. This article will show you how to remove them using a Phillips head screwdriver, and then how to clean the brewer and reattach the pod holders.
- To remove the K-Cup pod holders, you will need a Phillips head screwdriver . If you do not have one, then you can purchase one from most hardware stores for around $10.
- Once the K-Cup pod holders are removed, use a vacuum cleaner to clean all of the residue that is left on the brewer. Make sure to dry all of the parts before reattaching them.
- Once your Keurig Supreme has been cleaned, it is ready for your next batch of coffee!
3. Carefully wrangle the entire machine–front to back–out of its housing
Keurig machines are large and heavy, so it’s important to take care when removing it from the housing. Use a pair of sturdy hands to carefully wrangle the entire machine–front to back–out of its housing. Once it’s out, be sure to clean all of the water and coffee grounds from the machine before disassembling it. To avoid damaging your Keurig during cleaning, we recommend putting it in the dishwasher on a delicate cycle or hand-washing using cold water and soap. Finally, store yourKeurig machine in an upright position to protect the glass carafe lid.
4. Lift up on one end of the machine, then set it down in a large bowl or trash can filled with fresh water (do not submerge) 3 times, making sure to swirl and agitate the water as you go
As with most appliances, the keurig can become clogged over time. This blockage can prevent water from reaching the coffee maker’s brew chamber and lead to a lack of flavor and poor performance. To descale your keurig, follow these simple steps:
- Remove any removable parts (copper mesh filter, carafe) by gently lifting up on one end and pulling it out carefully
- Fill a bowl or trashcan with fresh water and place your keurig in it
- Submerge the machine completely underwater for 3 minutes
- After three minutes have passed, remove your keurig from the water and dry it off with a soft cloth or paper towel
- Reattach any removed parts
5. Place one absorbent pad at a time over each opening made while unpluggging and fiddling; press firmly into surface of water to dampen foam
If your Keurig Supreme is not brewing the water properly, it may be because of build-up on the coffee machine’s internal parts. This build-up can come from repeated Brewing and causes damage to the machine. To descale your Keurig Supreme, follow these simple steps:
- Unplug your Keurig Coffee Maker by holding down both buttons at once (the power button and the screen lock button).
- Find one absorbent pad and place it over each opening made while unplugging; press firmly into surface of water to dampen foam.
- Make sure all areas around the openings are covered in foam – this will help stop your Keurig from repeatingly brewing water and causing damage
6. Replace all six pads, screwing on holder just far enough so that water cannot enter between top part of K-Cup pod holder and main body of machine; again swirl and agitate liquid before installation
Keurig machines may be harboring microbial colonies that can cause bad smells, dull colors, or discoloration of the water used in brewing. To avoid these problems and restore your Keurig Supreme to its original glory:
- Remove all filters and descale reservoir. These items will hold onto any microbial colonies and must be completely removed before proceeding with steps 2-6.
- Pour 1 gallon of vinegar into machine. This will react with minerals built up on the internal parts of the machine over time and break them down into non-toxic chemicals that can dissolve grease , bacteria, mold , etc
- Replace six pads : Be sure to replace each pad halfway through its lifespan so as not to trap debris between it and the main body of the machine
- Screw on holder just far enough so that water cannot enter between top part of K-Cup pod holder and main body of machine; again swirl and agitate liquid before installation
- Fill fresh water tank ; pour a little bit at a time while stirring until entire tank is filled
- Swirl & Agitate Liquid Before Installation.
7. Set machine upright in housing; check for leaks and refill as needed
If you have a Keurig Supreme, your water reservoir may be starting to lose its color. This happens because of the plastic material that the reservoir is made from. The solution is simple and can be accomplished in less than 10 minutes: Remove the water reservoir by unscrewing 4 screws at the top of the machine. Once it’s gone, set the machine upright in its housing and check for leaks. If there are any, refill as needed using fresh water or a tapwater filter pitcher (which will remove chlorine and other contaminants).
Now that the machine is Descalced, it’s time to get ready for your next k-cup. Be sure to follow these instructions carefully, as incorrect or careless procedures may lead to future repairs or even water damage. Thank you for reading, and we hope this article was of help.


